fantastic.
xxx
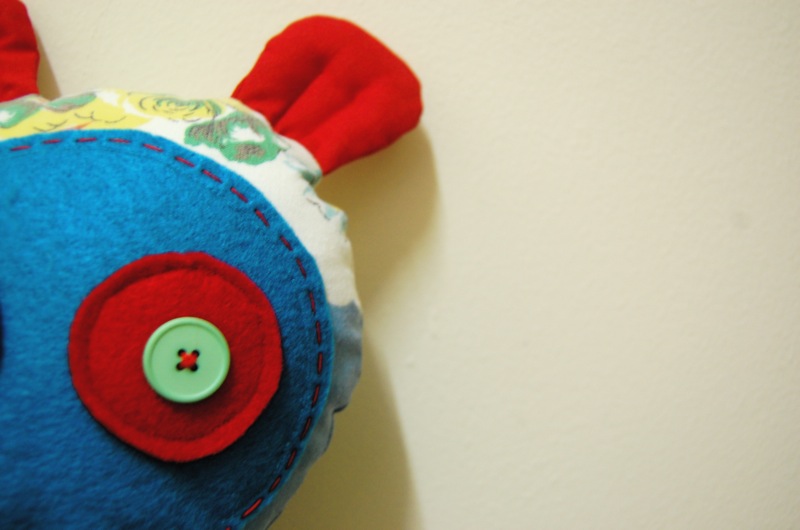
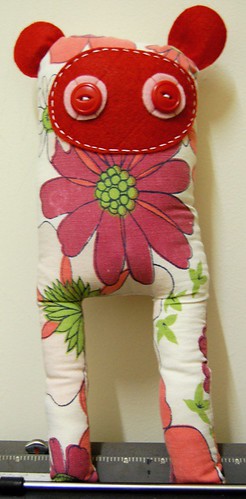
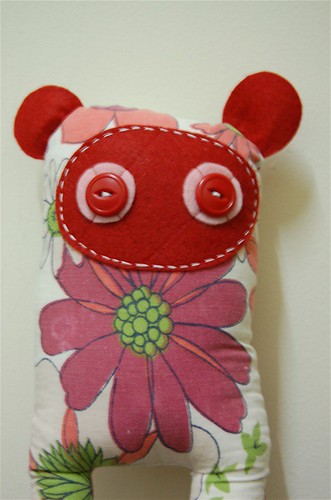
This one is one of the best of the lot....I've changed the pattern around a little, trying to make the limbs sit a little better, and changing the place where I leave it open for stuffing......
Oh, and in case you were wondering, Nongs never have arms. It's just the way it is. For some reason I don't think they need them...
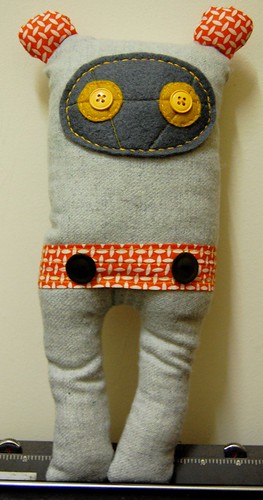
This one is from the old pattern....so is a little more wonky than I would like....
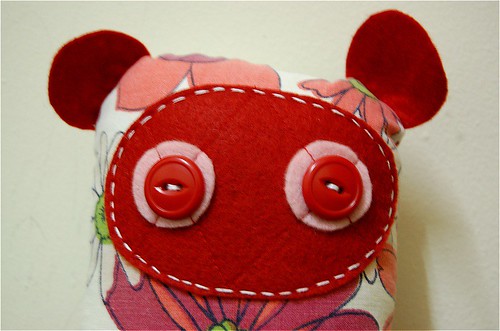
It is satisfying to know that each one I make does get a little better, though... I'm still not convinced that anyone will actually want to buy them, but after I've made a few more, I think I'll list them in my shop, and see what happens.....
Right now, I'm tossing up between opening an Etsy shop, tried, true and tested, or going out on a limb with a similar site that is Australian-focused.... It's called MadeIt, and it's the same as Etsy, really, just an Australian company, using Aussie dollars, and open to overseas buyers anyway, with PayPal and all that jazz...... So I can't see that it would make a HUGE difference which one I should choose, I guess I just feel like I should give the local one a try......
Anyways, whatever I decide, you'll all be the first to know!
Well, it's Taiwanese Noodle Soup time for me, before a crazy Friday night working at the pub......see you all after the weekend!
* Oh, and for those of you who asked - I HAVE finished Harry Potter, and I've added an email address at the top right of the page, so if you want to email me about Harry, or anything else for that matter, go ahead! xxxx
Todays finds?
Four spools of lace weight yarn, in gorgeous warm tones...$1.75 each:
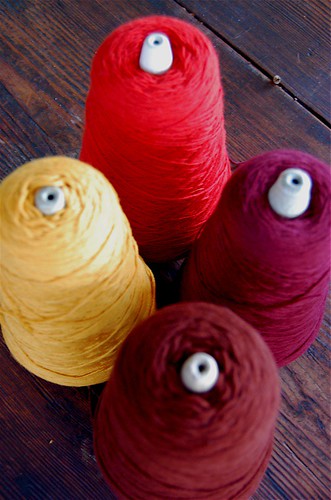
Not sure what I'll knit from them, but I'm keen to see how the light weight yarn works on the needles....
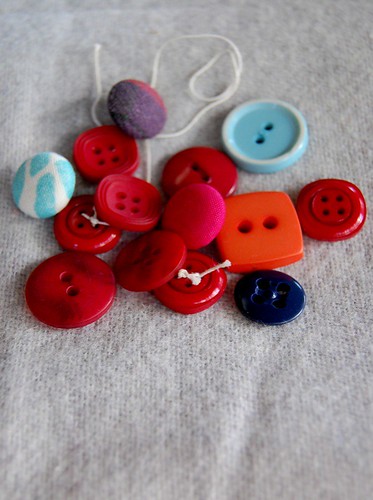
A little pile of mismatched buttons + a good length of nice and soft light grey wooly flannel that I think will end up as a serious, tweedy-looking Nong....
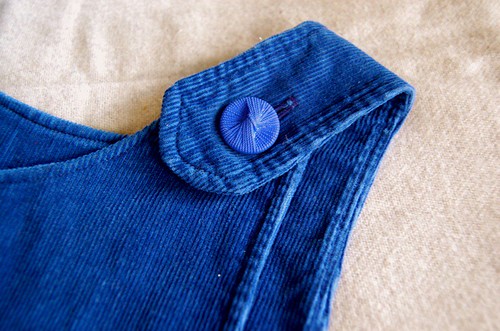
Yet another present for my neice, who is getting packages-a-rama in the mail from me lately.....this is just a sneak peek for my sister, before I send it!
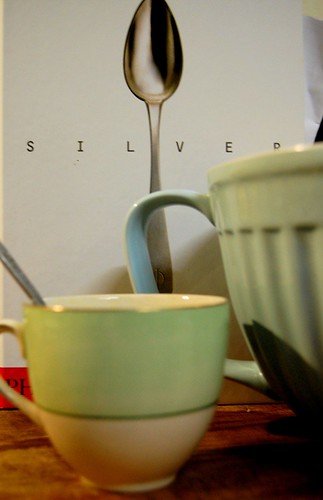
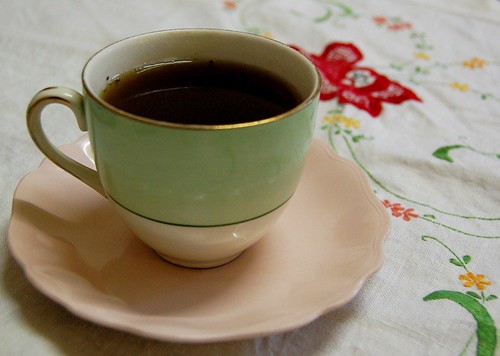
Plus, The Best Teacup In The Whole World:

It's not in the best condition, which is a damn shame, *but* it's red white and black (my all time favourite colours), comes as a trio, AND it has polka dots. What more could you want?
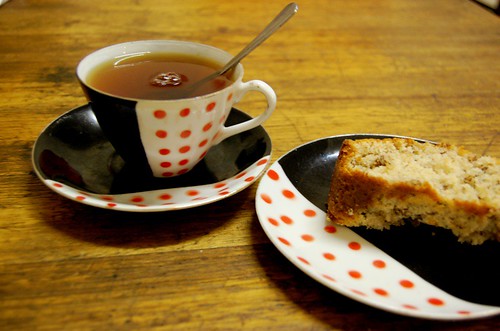
After trawling around op shops for the afternoon, I had an insatiable craving for cake.....so, for once, I actually made one myself....
Despite my love for vintage crockery, I'm not really a kitchen kind of person. I ADORE good food, and love to eat it, but I'm not a very good cook and I don't often spend time in the kitchen. I blame it on my lifestyle: working nights doesn't really lend itself to the whole cooking, sharing and eating thing, it's more of a grab and run affair. Pity.
So it was nice to make a cake for once; this one from a tried and true recipe of my Mum's - a basic teacake that doesn't call for masses of ingredients, and you can throw whatever you have in the cupboard into it, in this case, walnuts and nutmeg:

This be the recipe:
Basic Tea Cake
ingredients:
60g butter, softened,
1 tsp vanilla essence,
2/3 cup caster or fine white sugar (you can actually use any sugar you want)
1 egg
1 cup self raising flour
1/2 cup milk.
cream the butter and sugar, and add egg, a little at a time, beating in as you go. Gradually stir in the flour and the milk, alternating between them, and beat until fluffy.
grease your cake tin, throw in the mixture, and bake for 30 mins in a moderate oven.
That's the basics, I usually add some cinnamon, top the cake with apple slices and raw sugar, or put half the mixture in the tin, top with custard, then the rest of the mixture, so the custard bakes in the middle....mmmmmmm
Tea and Cake. What could be better?
xxxx
Here's the apron I made for my neice, who has taken to helping my sister clean the house, and of course, needs to look the part!
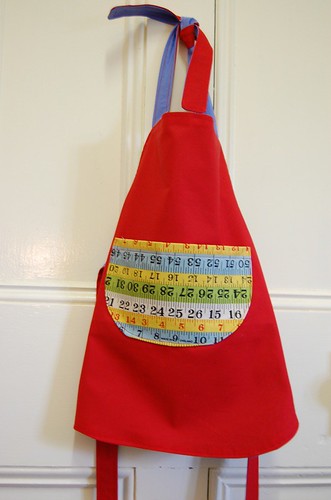
It's reversible, with a girly side, and a tomboy side!

and apparently she loves it, and I've seen some pretty cute photos of her wearing it....
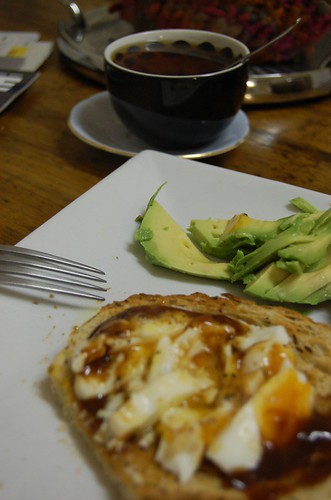
There's also been a bit of leisurely breakfast eating...
And some experimenting with some new styles for my stuffed toys, none of which are worth showing below the neck.....

So tonight is going to be all about making patterns, and trying again. :sigh:

I actually haven't started it yet, because I'm working today and tommorrow, but come Tuesday? The fire will be lit, a pot of tea made, and I'm not getting off the couch for hell or high water!
Happy reading everyone!
xxx
Sourcing and buying fabric you like can be a little difficult, but perseverence does pay off in the end!
Patchworking or quilting fabrics are really popular amongst crafters, the 100% cotton fibre feels wonderful and is great to work with, the prints are many and varied, and it's easy to buy small amounts, stash it away, and figure out what to make from it later.
The main problem I have with quilting fabric is that I am VERY picky when it comes to pattern. I prefer bolder, brighter styles, have an aversion (in most cases) to floral, and despise pink. Many many many quilting fabrics don't fall into this category. Luckily though, there are some designers that favour bold prints, and the new generation of crafters are inspiring a greater variety of fabrics, rather than your traditional pinks, muddy colours, tiny florals and such.
One of my favourite designers, Denyse Schmidt, makes a gorgeous range of bright cotton prints with vintage influences that I really love. The fabrics are a little lighter in weight than I am used to, but the prints are GORGEOUS.
So, advice number one, find some designers you really like, and follow their collections. That being said, ONLY buy fabrics you love, or think you can love. There's no point buying a whole stack of Amy Butler prints if you hate the colourways. Buying designer fabric just because it's designer is just as absurd to me as spending the equivalent of a small house on a handbag just because it's a Vuitton. You might have fashionista cred, but your handbag will still be fucking ugly!
Tip number two: Buy Online. In Australia, the average price for quilting cotton is around 20 - 25 dollars a metre. Online, the same fabric sells for anywhere between US$5 - $20 a yard. In most cases, even including postage, exchange rate, and yards versus metres, The fabric I buy online ends up costing me about half the price it would if I bought it retail in Australia. This is a real pity for me, I would much prefer to go to the fabulous local quilting shop and buy up a storm, but the reality is, I just can't afford to.
Instead, I frequent a few select online fabric stores that come highly recommended by other crafters, and have always provided me with consistently good product and service. A few of my favourites?
Superbuzzy specialises in japanese fabrics, notions, books and supplies, stocks a brilliant range of weird and wonderful bits and pieces, and every time you order something, they send you some Japanese lollies as well! The fabrics I used in my pincushion tutorial are both from Superbuzzy - Some of thier fabrics are a bit cutesy-poo for me, but they do stock some great bright, graphic prints as well.
Repro Depot sell a fantastic rance of vintage and retro themed fabric, buttons, patches, trim and notions. They always have something on sale, and unlike other stores, the sale bin usually has something good in it, rather than just the ugly fabric no-one wants to buy!
Another fabric store I love is Z and S Fabrics. They sell lots of my favourite designers, have a good turnaround on new fabrics, and a range that is so big, I can't even get my head around it.
I have purchased fabrics from all of these stores, and can personally recommend them. There are loads of others, feel free to look at them too, but I'm sticking to places I have actually bought fabric from for this post....

Tip Number Three - Don't forget the Op Shop. Thrifted fabric is brilliant. It's cheap, varied, compatible with re-use and re-cycle ethics, and usually of a nature that you will not find anywhere else. Keep an eye out in your favourite thrift shops, it's amazing how much fabric is out there if you look for it.
Depending on what it is that you make, don't forget to rummage through not only the fabric bin, but the sheets and linens, tea towels and blankets. Clothing can be cut up and made into other things, especially fabric heavy items like skirts, sarongs, shawls and dresses. Wool jumpers or sweaters can be felted in the washing machine with soap and hot water, and used to make other things. At the op shop, anything is possible. Learn to see the fabric, not the ugly outfit. Some of my favourite fabrics have been found in the op shop, and you'll usually get much larger amounts of fabric too!
Tip Number Four: Your bog-standard fabric shop. I still routinely drop into Lincraft and Spotlight, and never leave Ikea without at least a metre of fabric under my arm. These places are full of mass produced shit, but sometimes there's a gem in there that you'll die over.
On one of my last Spotlight visits I got 5 metres of lightweight linen for $2 a metre because it was old summer stock.
The fabric at Ikea is big and bright and bold, cheap as, and heavyweight cotton drill to boot. Perfect for furnishings and cushions, things you might get sick of in six months and want to change. There's no shame in a chain store, just remember to ONLY BUY FABRIC YOU ACTUALLY LIKE!!!!! Same rules apply as for designer - don't buy it just because it's cheap! Only buy it if you really like it or you know EXACTLY what you're going to use it for!
Well, that's it. The Mega Fabric Post!
My only last peice of advice is: don't be afraid to buy fabric, don't worry about what it was before, never mind if you don't know exactly what you're going to make out of it (as long as you love it, that is!), and when you get it home, don't be afraid to cut into it!
I hope that's been of some help to those of you who asked.....
xxx
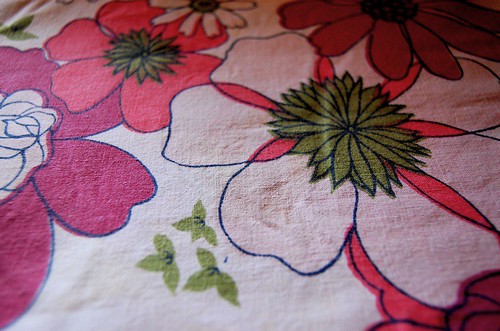
A vintage bedsheet, in gaudy pink and red floral, some cute vintage sewing patterns, and some self-cover buttons, which I love....
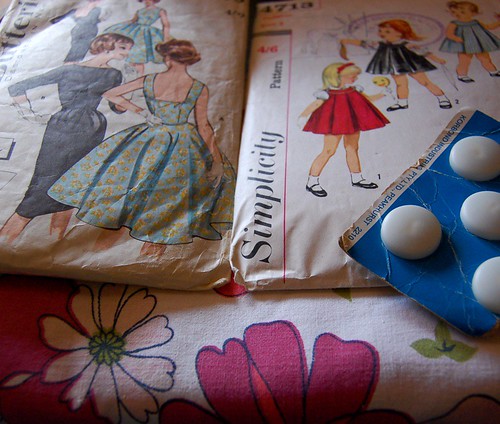
I'm loving the fitted bodice and flared skirt on this little frock...
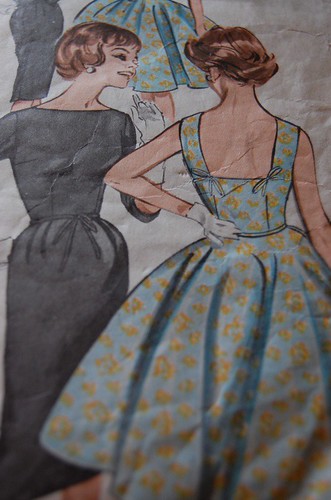
And even though, as a rule, I generally hate pink, I can see some girly Nongs being made out of this fabric....
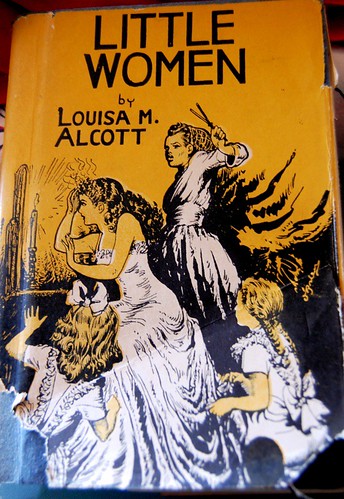
And a beautiful, if rather battered, vintage copy of Little Women, which I haven't read since I was little....
I also managed to score a frock for our inaugural Mid Winter Ball at work, it's on Saturday, and I've been sewing away, making a petticoat for underneath, and making some minor adjustments to the fit of the frock..... I'll post some pictures of it once it's done!
Otherwise, tonight it's soup making, television watching, and costume adjusting......
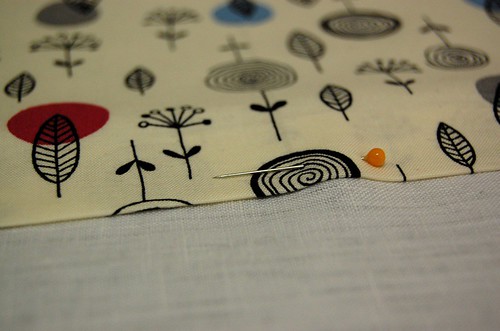

And a bit of this....
I've been a bit slack around here lately....feeling a little poorly, so lots of sitting on the couch playing the Harry Potter video game! (I've never played video games before....I keep walking into walls and casting spells on the wrong things!). But today I had a bit more zing, cleaning the house and getting ready for a busy weekend at work...
There are a few more Nongs in the works, and the little project you can see in the photos above, but otherwise, slow sailing around here.
Have a great weekend! xx
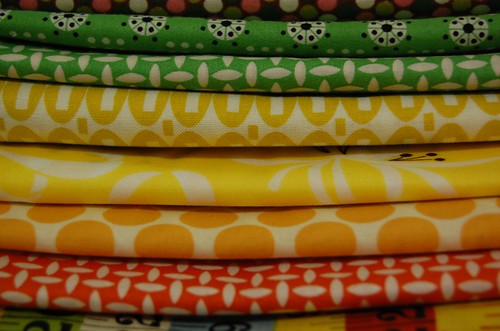
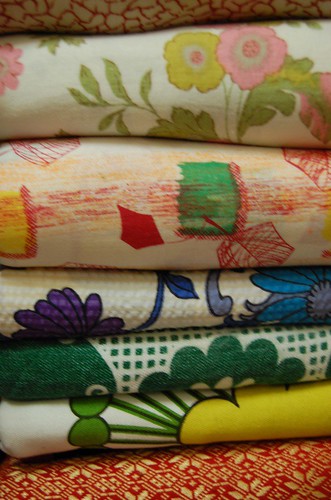
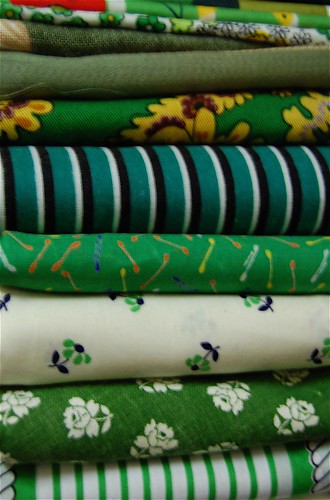
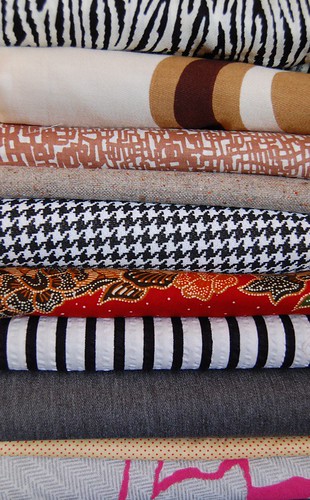
So, on to the finds......
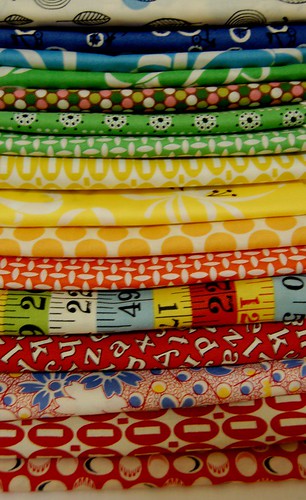
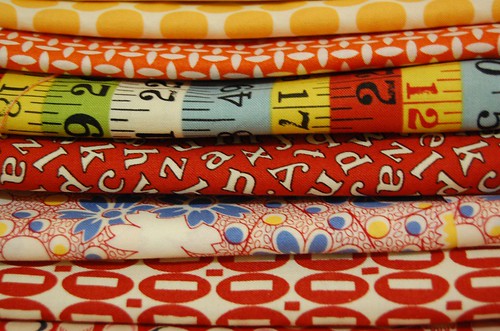
A whole pile of fabric, a bit of a mongrel bunch this time, but all individually quite good for what I plan to use them for....
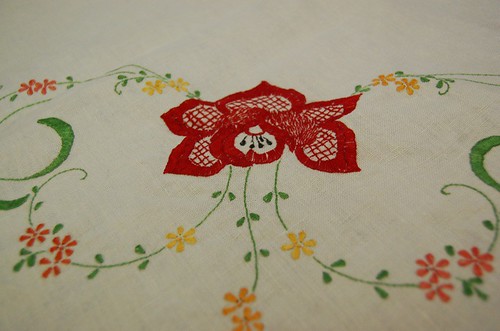
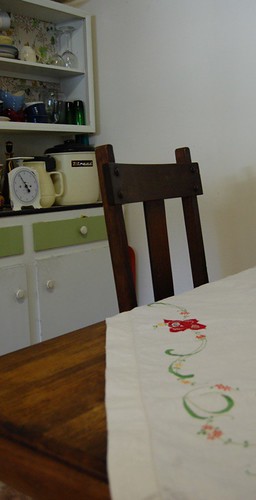
But the fabric find of the year was this AMAZING vintage linen tablecloth, hand embroidered, and ABSOLUTELY GORGEOUS, for six dollars.....
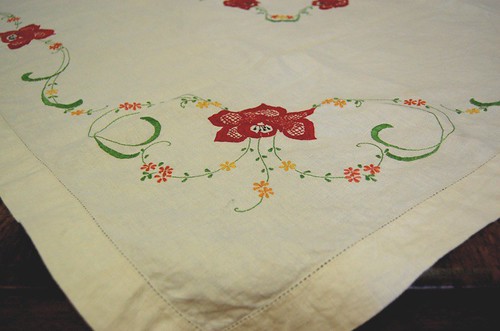
How on earth anyone could ever have the patience to embroider so well is absolutely beyond me!
And just for overload on the tablecloth - here it is in my kitchen...
After those finds, I was on my way home, when I decided spontaneously to pop into another op shop I haven't been to for ages, where I rarely have any real luck, just on the off chance that there might be something......
Boy, was there something!
The ENTIRE SET of Childcraft Library books, the lot for five dollars.
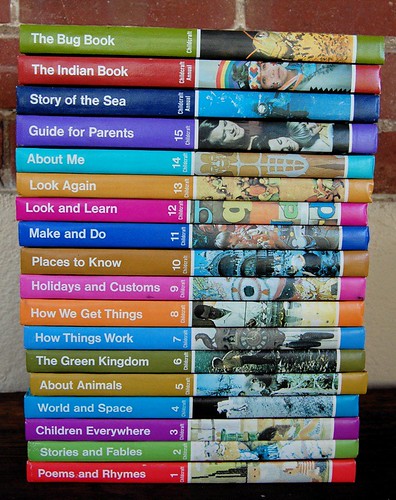
For those of you who are not familiar, the Childcraft Library series is like a set of encyclopedias for kids, from the seventies, with the best illustrations in the world. We had a set of these when I was a kid, and I spent hours and hours poring over them, learning stuff (I was, and still am, and unabashed bookworm), hassling dad to help me make stuff out of the "Make and Do" book, and getting my first dose of Greek Mythology (another of my loves) from the "Stories and Fables" edition.
It's on par with finding a whole set of Golden Hands, or Enid Blyton books, or something similar.....
Here's a couple of pages so you can see what I mean...
From Stories and Fables....


From Make and Do:

Love it.
Before I go, I just wanted to say a thankyou to everyone who commented on the pincushion tutorial.....having never done a tute before, it was good to know that other people found it useful!
I hope you're all having tea and cupcakes, wherever you are....! xxx
After rearranging my studio, and ending up with two workspaces, one for cutting, and one for sewing, the need for an extra pincushion became very clear, and after seeing these two examples by Heather, and Manda, I thought it was time to give it a go. (I probably would have bought one of Manda's, but by the time I saw the post she had sold out! Gah!)
So here goes:
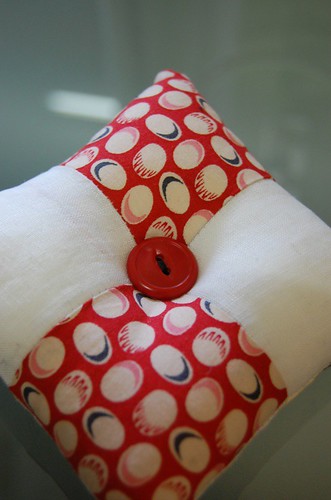
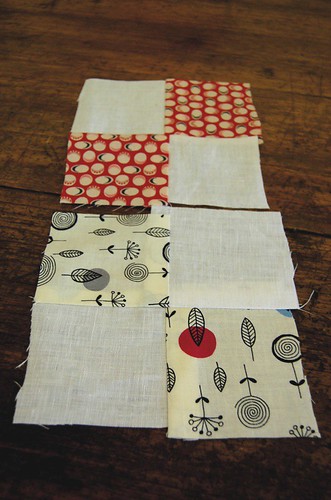
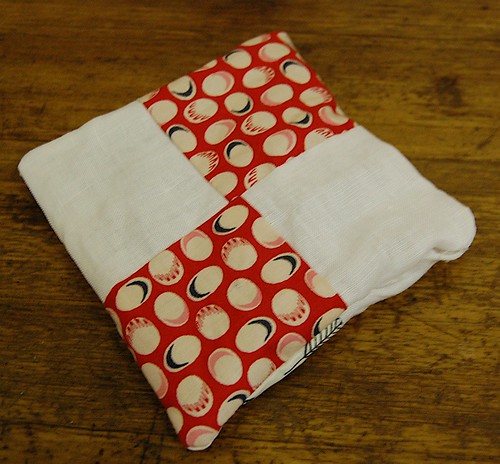
This pincushion is a simple patchworked number, four squares on each side, with a button detail in the centre. Easy Peasy.
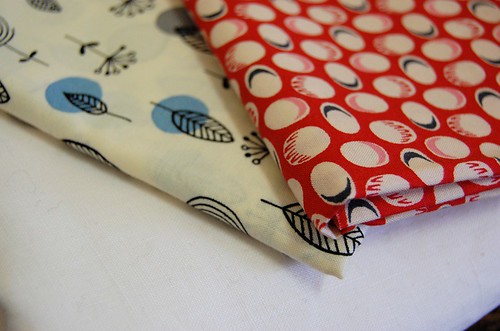
First of all, you need to choose some fabric. I ended up with a plain white linen, plus two contrasting cotton fabrics, so the cushion would be different on each side.
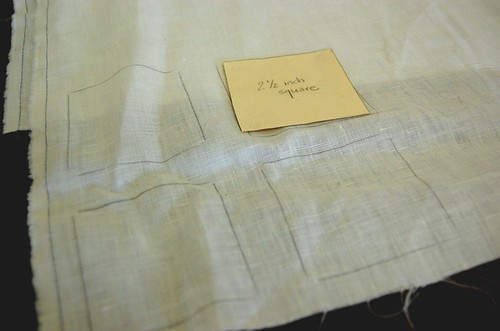
Then, make yourself a little 2 1/2 inch square template out of cardboard or such. I don't have a rotary cutter or quilt ruler or any fancy tools, so I trace directly around the template onto the fabric, and then leave a seam allowance around that when cutting. This leaves the traced line as your sewing line, and gets rid of the need for perfect 1/4 inch seams and such. It's a inperfect art, but there you go.
So trace around your templates, remembering to leave a seam allowance....You'll need two squares each of the contrasting fabric, and four of the plain.

Cut out your squares.

Stitch the squares together, following the traced stitching line, to make two 5 inch square blocks. Press the seams down flat. Don't stress too much if your squares don't meet perfectly in the middle, your button will cover that at the end anyway...
Place the two block right sides together, and stitch all the way around the outside, leaving a small hole for turning it round the right way and stuffing. Trim the seams and clip the corners.
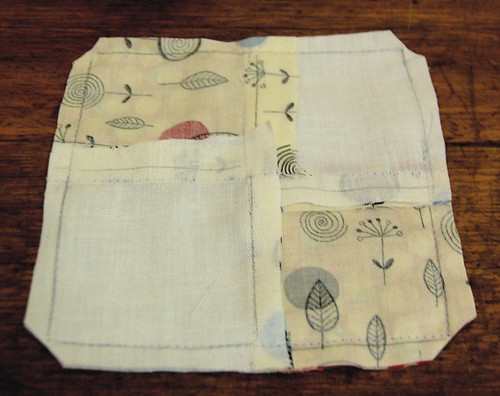
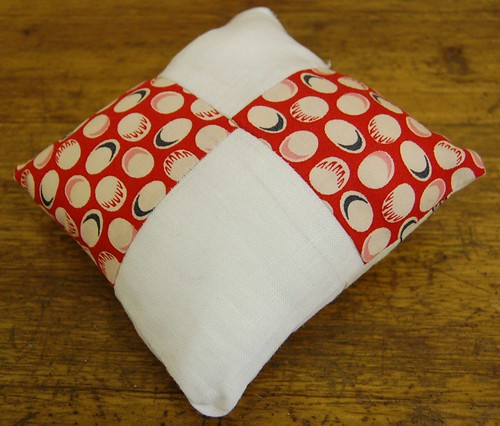
Turn that sucker inside out (well, the right way round, actually), poke the corners out, and then stuff it quite full with stuffing.
You want your pincushion to be quite plump, so overstuff it as much as you can without straining the seams....

Sew up the hole you left for the stuffing with tiny little stitches, or some crazy invisible stitching method that you know (and I don't!)
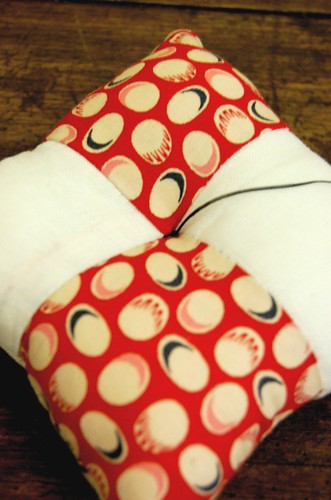
Now it should look like this:
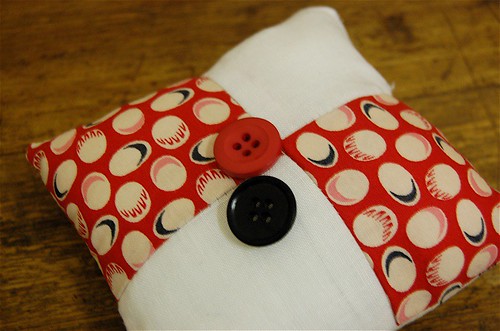
Now for the fun part - finishing!
Choose some buttons that you like to go with the fabrics you've chosen.
I used waxed linen thread for the button part, because it's strong, and you'll be pulling on the thread quite hard, so make sure you use something reasonably strong.

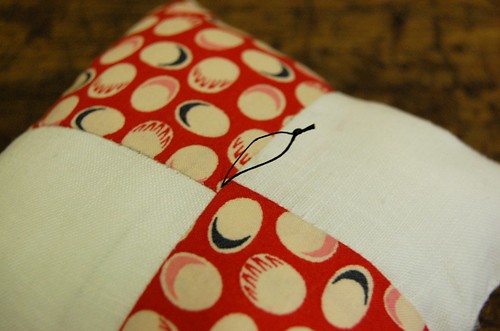
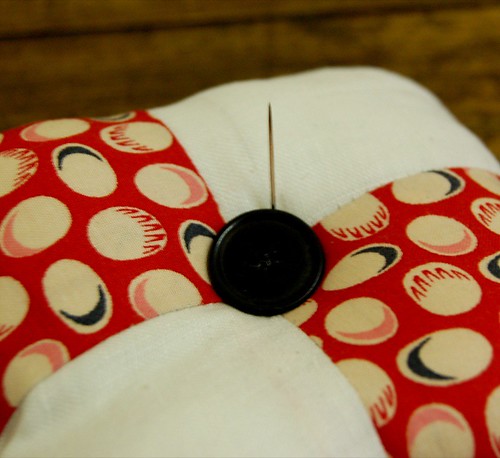
To start off the stitching for the buttons, thread your needle with a double length of thread and tie a knot at one end. Poke your needle through the centre of your pincushion, making sure it comes out in the centre on the other side.
Pull the thread through, but leave a small loop on the front side.
Make a small stitch on the reverse side, bringing the needle out in the centre once again. Don't pull the thread through just yet.
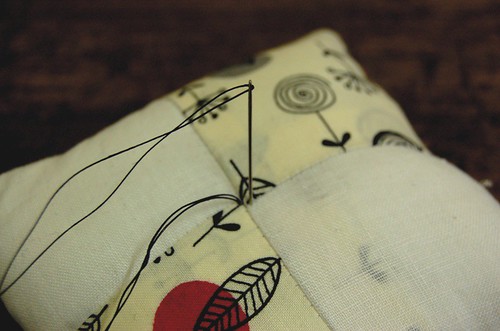
Before you pull the thread through, slip your needle through the loop you made, which will stop the knot from slipping through the fabric into the middle of the cushion.
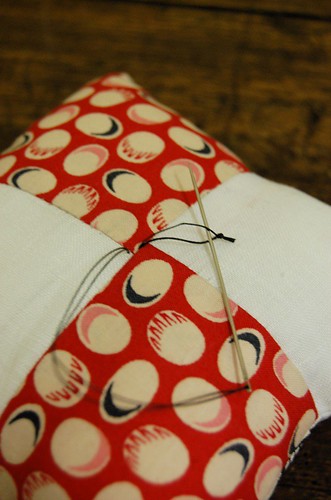
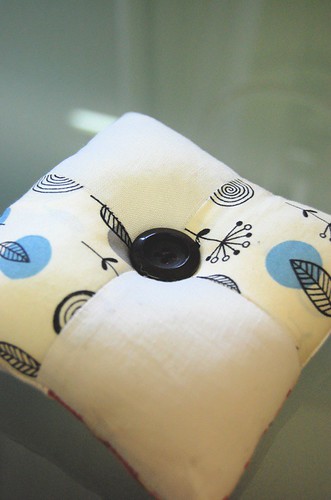
Pull the thread tight, which should tighten up the loop you left hanging, and bring the whole centre of the cushion in, giving your cushion that cute shape you want.
Now sew your buttons on, stitching right through the centre of your cushion, pulling the thread tight, making the buttons press down in the centre. Use similar sized buttons so you can match up the holes reasonably well on both sides.
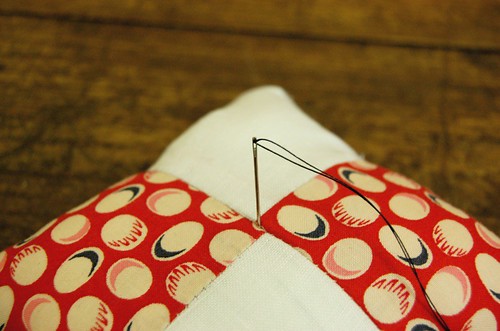
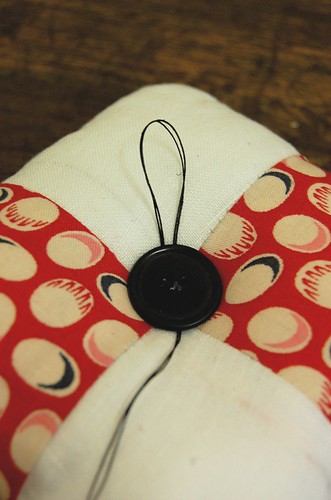
When the buttons are secure, bring your thread up to the top, but not through to the other side of the button. Instead, ease the needle out behind the button. This takes a bit of managing, but you should get it without too many dramas.
Your thread should now lie behind the top button like this:

To make a secure knot, use the thread to make a loop behind the button, like so:
Slip the needle through the loop, and tighten well, behind the button. Do a couple of these knots, and then trim off your thread so it hides behind the button.
And voila! You're done!
For those of you with loads of sewing experience, this is a peice of cake, and nothing you won't have seen before. But if you're a beginner, give it a go, especially the button tying technique; this is how I sew on all my buttons, and I haven't had one fall off yet!
Well, there you have it, my first tutorial. If you'd like to see any of the photos in more detail, just click on one and you'll be taken to my Flickr page, where you can see them bigger if you like.
I hope you liked it!
xxxx